Sunday, June 2, 2013

Texture Print

This is a photo of my print. It was a piece of linoleum that I cut into, painted over, and printed on paper. The first thing I did was find a picture of a fish and then find a picture of an underwater scene. Then, I drew a sketch of the fish and the underwater background. I had to make sure it had contour lines and texture to look realistic. Next, I cut the sketch to the size of the slab of linoleum and transferred the sketch onto the piece. After that, I used a cutting tool to cut out the sketch into the linoleum and give it lots of texture in the background as well. The next thing I did was a practice print where you put paint on the linoleum and press it onto a piece of paper to see where it needs to be cut more. After you cut it more and fix the imperfections, you can use any color paint to put on the linoleum and print it onto a piece of paper to leave the print of the fish. This project taught me how to use and cut linoleum, blend two colors together on a print, and create texture in your art.

Thursday, May 30, 2013

Paperbag Sketch

This sketch is of a paper bag. I used many techniques to create the shading and shadow. First, I got an actual paper bad and set it up to my liking. Then a spotlight was put on it to cast a shadow. Next, I drew the paperbag and all the creases and folds I saw too. I used a bigger pencil to draw the sketch and used the side of the pencil to shade. I used value in all the shadows and darker parts of the bag where the creases are. Then, I drew the cast shadow and used value in that as well. The shadow was much darker closer to the bag and got lighter as it went out. Lastly, I used piece of a paper towel to blend the shadow and make it look more realistic.

Acrylic Landscape Painting

This is my favorite project, the acrylic landscape painting. I organized the beginning of my painting by first finding various pictures of a sky, background, middle ground, and fore ground that I can put all together. Then, I drew a black and white sketch of what my painting will look like with all of the pieces and pictures together. I chose to paint a sunset with an island in the background, rocks in the front, and birds in the sky. The light source was the sun and it created shadows on the island and light shining on the water. My painting's color scheme was complementary using blue and orange because they are on opposite sides of the color wheel. The brush strokes I used for the sky and water were smooth and blended together. For the rocks, I used a piece of a creditcard to make them seem sharper and rockier. The value in my painting is in the sky, water, rocks, and palm trees. The sky is darker at the top and gets lighter as it gets closer to the sun. Also, the light from the sun reflects onto the water and is darker blue on the sides. The rocks also differ in shades of gray and the palm trees are different shades of green.

Wednesday, May 29, 2013

Ceramics Project

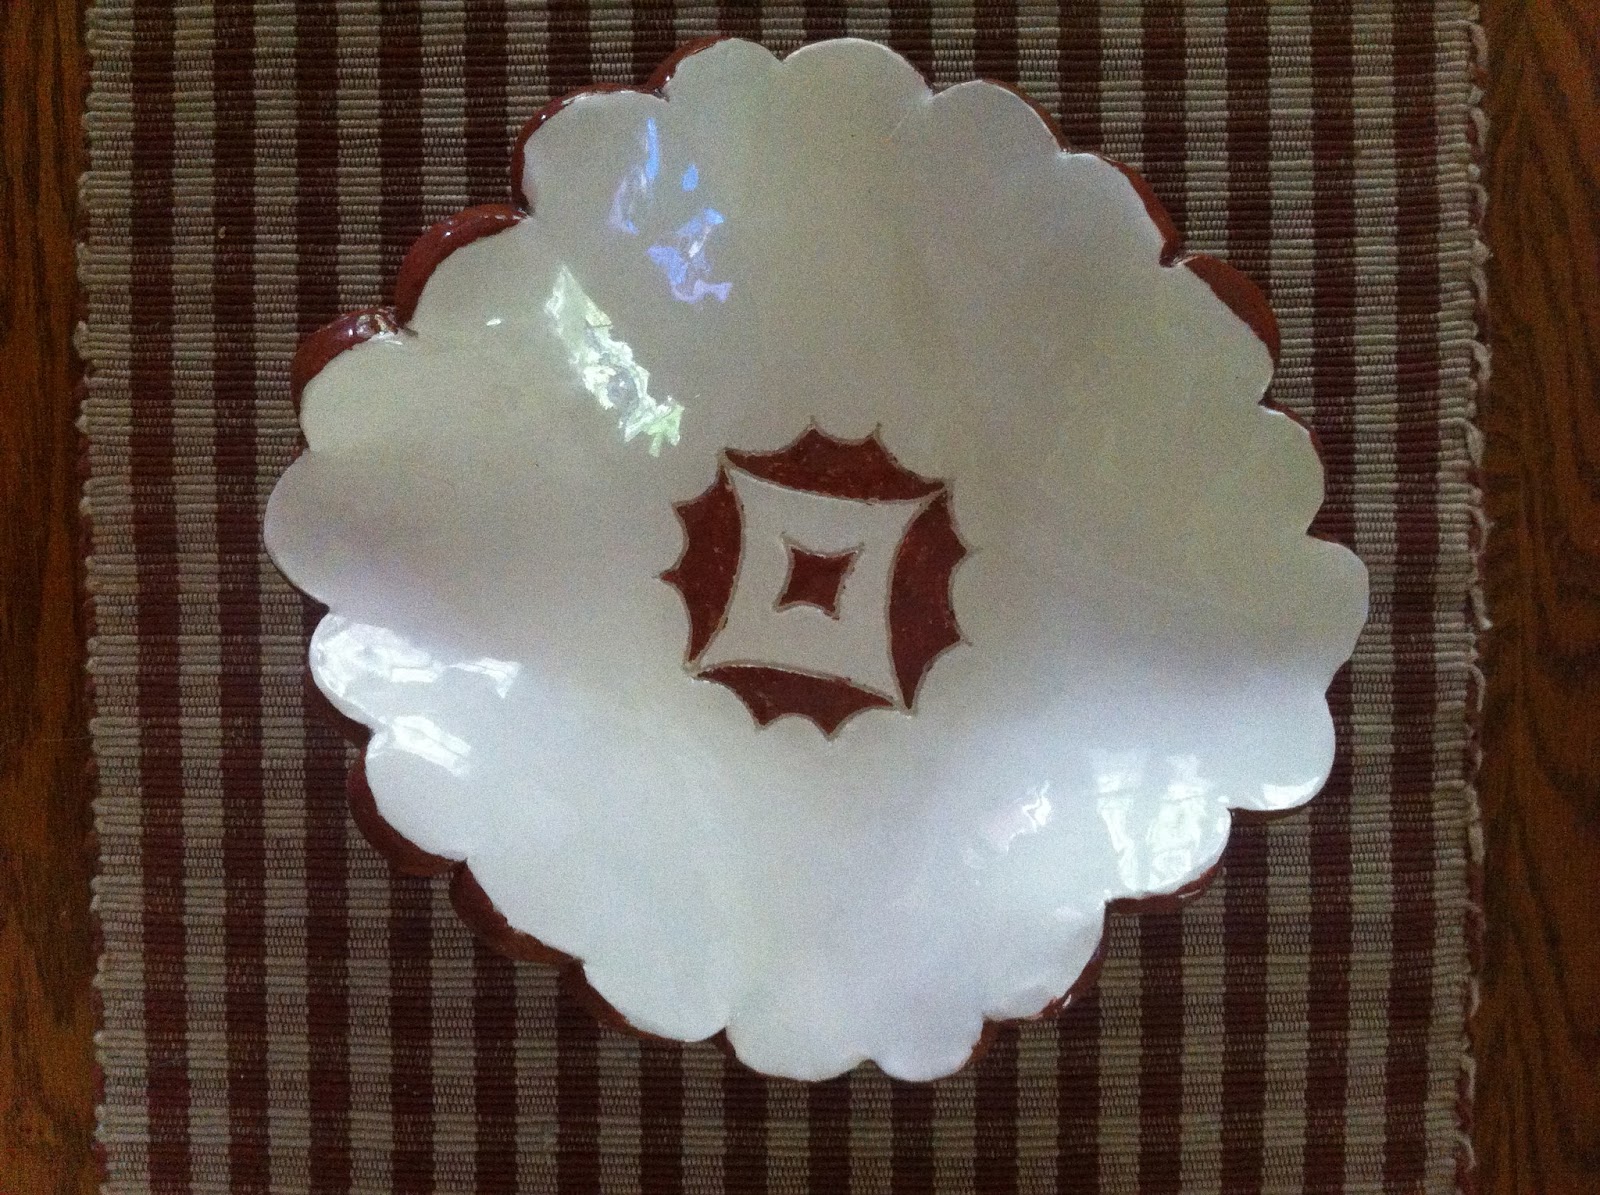
This is my ceramics project. I would say it is about medium size. It's not too big or too small. The design element stressed was radial. The construction and inside design is a radial design. I used the hump technique using a mold of a bowl and then smoothed out the clay. After that, I smoothed the sides of the bowl, added the bottom foot, and eventually drew my radial design in the middle and painted it with red clay. The function of my project is just a decoration or centerpiece although it could hold something. One thing I learned from this project was how to use bowls to form a mold for the clay and also how to cut, smooth, and paint it right. If I could redo this project, I would make the bowl so that if I put food in it, it wouldn't be able to fall out easily. Also, I would have liked to make my radial design more elaborate and creative.

Pastel Still Life Project


This is my pastel still life project. I planned my composition by getting a small bowl and arranging the candy canes the way I want. I also drew a thumbnail sketch and used a viewfinder. A viewfinder is a small piece of cardboard with a rectangle cut out so you can look at the items and see the position you want to draw it. Then you use the viewfinder to draw thumbnail sketches which are different sketches of the items in different positions or views. The viewfinder helped me find a good position to look at my items and in which way to draw them. I made the items appear three dimensional by using shading, layers, value, and shadows. Also, my light source was behind the items so the shadows came forward and light came from behind the items.